Facebook Pages: A Timeline Cheat Sheet
As of March 30, 2012, Facebook will be switching the layout of all pages not yet on the new Timeline format. This should not be a surprise if you log into your account regularly—Facebook has been posting alerts about the change for weeks. Most likely, you’ve noticed some of your connections’ pages have changed in appearance as they’ve switched over. As of next week, all pages will have this same style.
The instructional videos that Facebook put together are informative and easy to follow, and I recommend watching them. Allyson Locke’s earlier post “Introducing Facebook Timeline Brand Pages” also provides a good overview of the changes. For those who need a quick cheat sheet on the most important changes and new features to be aware of as we approach the switch-over date, read on….
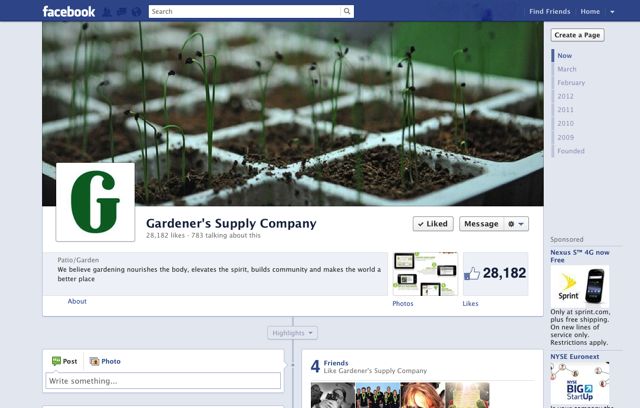
- The Cover Photo. The new layout includes a “cover photo,” which is a large image spanning the top of your page. Your profile image, which will continue to appear next to any comments or updates you post on Facebook, will show in an inset box in the bottom left corner of your cover photo. While your profile picture should be an image that represents your brand, such as your logo, the new cover photo gives you room for some creativity. Use a fun or offbeat photo if you’d like, a picture of your staff, or your office or your town if your business is locally focused. Ideally the cover photo is visually interesting and engaging while reflecting your business in some way. (Some good examples: Cabot Creamery Cooperative, Green Mountain Coffee, Gardener’s Supply)
- Tabs and Landing Pages. Be aware that Facebook no longer allows you to direct visitors to a customized landing page, such as a sale announcement or intro message. Your wall will always be the first thing people see, and from there they can click through to any tabs you’ve set up, if they choose (they’ll appear beneath your cover photo, to the right).
- Milestones. The new format allows you to track important events in your company’s history as “milestones.” To add a milestone, click “Milestone” in the status box. Facebook will ask you to start by adding the year that your company was founded. From there, you can add whatever significant events you’d like to share with visitors. You can also now edit dates on posts by hovering over the top right corner of the post, clicking on the pencil icon, and selecting “Change Date.”
- Pinning Posts. If you’ve posted something that you would like to remain at the top of your timeline, even as you add new posts, you can now “pin” it. Your post will stay pinned for 7 days (unless you un-pin it) and then drop to the place it belongs in your timeline. You can only have one post pinned at a time. To pin a post: Hover over the top right corner of the post and select the pencil icon, then “pin to top.” A yellow flag-like icon will show in the top right corner of the post, as long as it is pinned.
- Starring Posts. If you’d like to highlight certain posts, you can star them by clicking on the star icon that appears as you hover over the top right corner of a post. Starred posts will expand across both columns of your timeline so that they stand out.
- Admin Panel Updates . Facebook has also added some features to the admin section that make it easier to view information about activity on your page. While I won’t go into detail about the admin updates in this article, I do encourage you to click on the “Admin Panel” button at the top right of your page and explore.
When you’re ready to upgrade, simply log into your Facebook business page. If you haven’t already switched to Timeline, you’ll see a message asking if you’d like to preview your page with the new layout. Facebook has made the upgrade process extremely easy. Take some time this week to learn about the new features, select or create a great-looking cover photo, and turn on the Timeline!
Have any thoughts, reactions, or great ideas you’d like to share? Please comment below.